| Oracle® Data Mining Administrator's Guide 10g Release 2 (10.2) Part Number B14338-01 |
|
|
View PDF |
| Oracle® Data Mining Administrator's Guide 10g Release 2 (10.2) Part Number B14338-01 |
|
|
View PDF |
This chapter explains how to install Oracle Database to support Data Mining applications and development. It is directed primarily at users who want to install Oracle Database on a personal computer for their own use.
This chapter contains the following topics:
If you want to use Oracle Data Mining, then you must have access to Oracle Database. You may be able to access an existing installation instead of installing Oracle Database yourself. Contact your Oracle database administrator and inquire whether you can access an instance of Oracle Database 10g Release 2 that is operating in 10.1 or later compatibility mode.
If you can access an existing installation, then ask your Oracle DBA to do the following:
Install the Sample Schemas, if they are not already installed.
Install the sample Data Mining programs, as described in "Installing the Data Mining Sample Programs".Create a user name for you, as described in "Creating Oracle Database Users for Data Mining".
Provide you with the connection information.
Meanwhile, you can install a Data Mining client on your personal computer, as described in Chapter 3.
If you do not have access to an existing installation, then follow the installation instructions provided here for installing Oracle Database.
There are three installation disks for Oracle Database:
Database. Installs Oracle Database 10g Release 2 Enterprise Edition
Companion. Installs the Data Mining sample program files
Client. Installs administrative tools for Oracle Database; for installation only on a local computer when Oracle Database is installed on a remote computer
Documentation is available on a separate CD or from the Oracle Technology Network.
This chapter provides step-by-step instructions for installing Oracle Database on a Microsoft Windows platform. If you use a different platform, you can still derive the preferred settings for Data Mining from these instructions. However, you should be careful to perform any pre- and post-installation steps specific to your platform, because they may be critical to a successful installation. Refer to the Installation Guide for your platform.
To install Oracle Database, you use Oracle Universal Installer. This installation program is nearly the same on all platforms, with differences that arise because of the differences in the operating systems.
Verify that your computer meets the following requirements:
Processor: 200 MHz minimum
Available hard disk space:
System drive: 100 MB
Oracle home drive: 1.5 GB
Temp disk space: 100 MB
RAM: 256 MB minimum, 512 MB recommended
Virtual memory: double the amount of RAM
Video adapter: 256 color
The following operating systems are among those supported for Oracle Database:
Windows XP Professional
Windows 2000 with service pack 1 or higher
If any Oracle products are already installed on your computer, you must disable them before installing Oracle Database. Take these steps:
Delete the ORACLE_HOME environment variable:
From the Control Panel, choose System.
On the Advanced tab of the System Properties page, choose Environment Variables.
In the System Variables, select ORACLE_HOME, then click Delete.
Stop all Oracle services.
From the Control Panel, choose Administrative Tools, then Services.
On the Services page, scroll down the list of names and locate those that begin with Oracle. Select those services and choose Stop.
If you are installing from a network drive, use Windows File Manager to map that drive to your computer.
To install Oracle Database on a Windows platform, take these steps:
From Database (db) Disk 1 (of 1), run SETUP.EXE.
Oracle Universal Installer opens and displays the Welcome page.
Select Advanced Installation. Click Next to advance to each page.
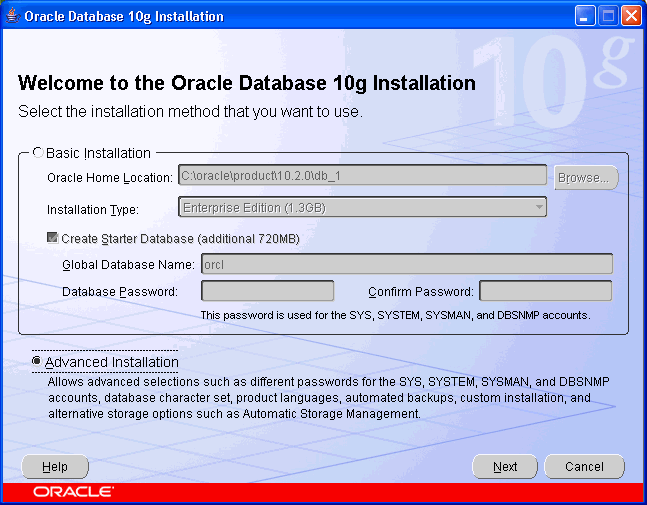
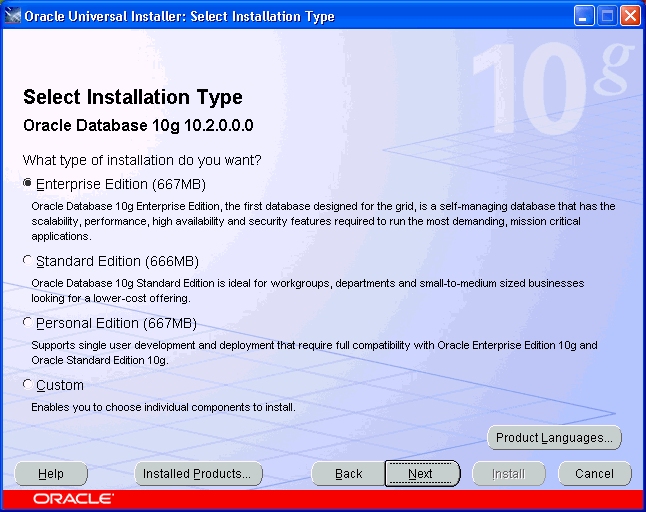
On the Select Installation Type page, select Enterprise Edition.
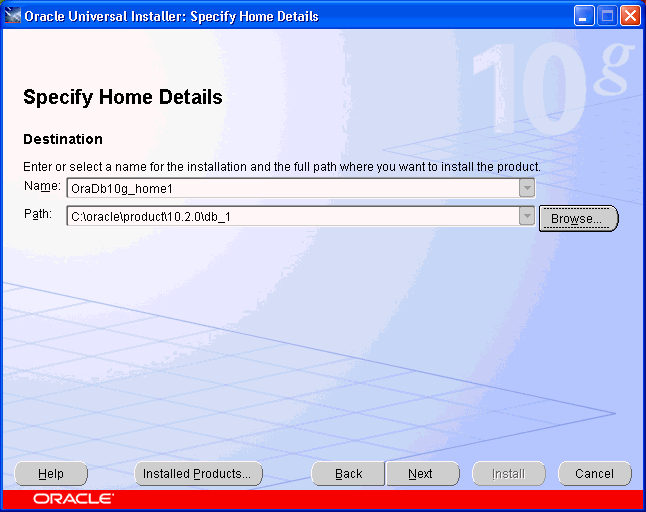
On the Specify Home Details page, create a new Oracle home directory.
On the Product-Specific Prerequisite Checks page, verify that all checks succeeded. If any checks failed, then you must correct the problem before proceeding.
On the Select Configuration Option page, select Create a database.
On the Select Database Configuration page, select General Purpose.
Complete the Specify Database Configuration Options page as follows:
Type in a global database name and SID.
The SID is a name that you choose. If you are installing on a personal computer for your own use, then the SID and the global database name are the same; the global database name does not include the domain.
Choose a database character set from the drop-down list. The Western European character set is a good choice for databases for the European Union and the Americas. UTF8 is a good choice for global databases.
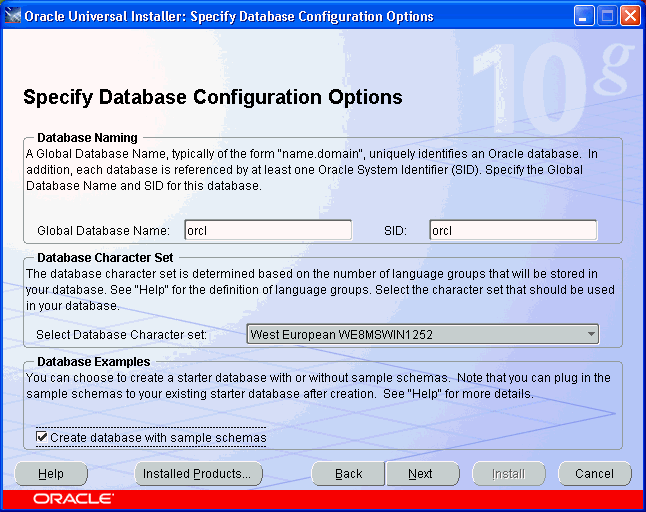
Choose the options you want. The following steps identify the simplest choices.
On the Select Database Management Option page, select Use Database Control for Database Management.
On the Select Database File Storage Option page, select File System.
On the Specify Backup and Recovery Options page, select Do not enable automated backups.
On the Specify Database Schema Passwords page, select Use the same password for all the accounts. Then enter a password of your choice in the Enter Password and Confirm Password fields.
On the Summary page, review your previous choices, then click Install.
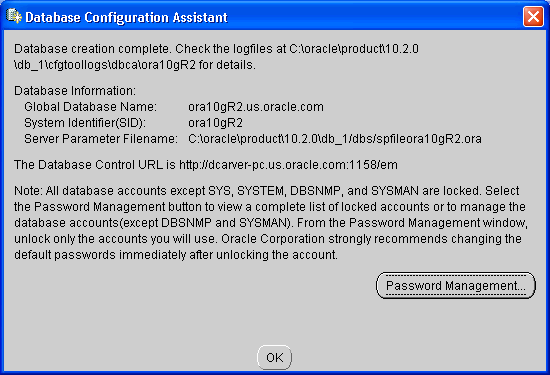
On the Database Configuration Assistant page, click Password Management.
Tip: Print a screen shot of this page or write down the information it contains for future reference.
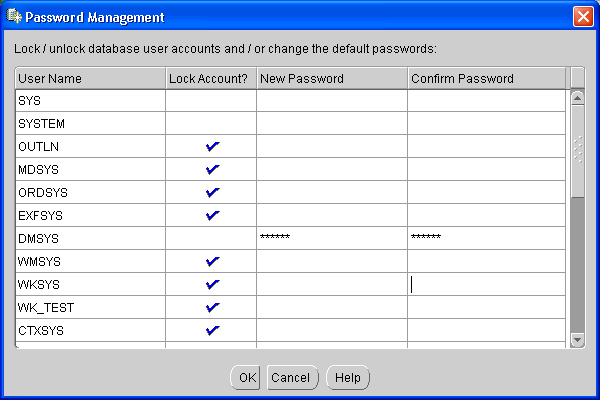
On the Password Management page, unlock the DMSYS, SCOTT, and SH accounts and enter new passwords for them.
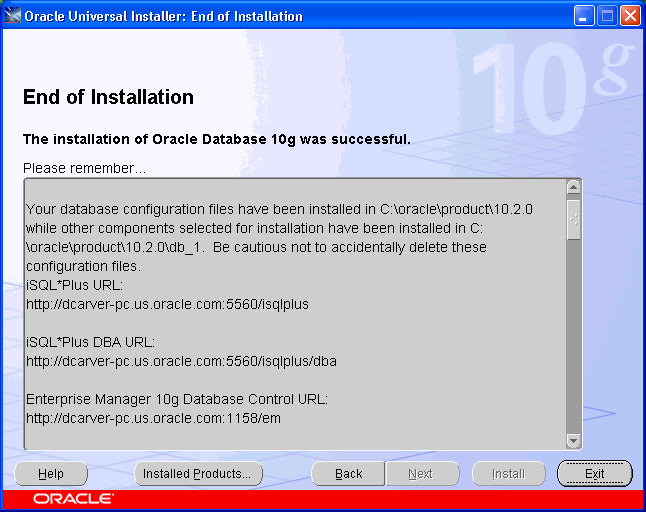
On the End of Installation page, confirm that the installation was successful.
Tip: Print a screen capture of this page or write down the information it contains for future reference.
To install the Data Mining Sample Program Files on a Windows platform, take these steps:
From Companion Disk 1 (of 1), run SETUP.EXE.
Oracle Universal Installer opens and displays the Welcome page. Click Next to advance to each page.
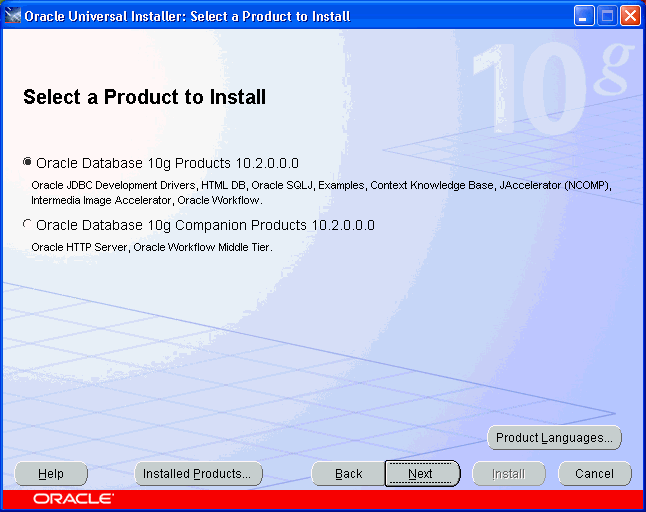
On the Select a Product to Install page, select Oracle Database 10g Products 10.2.0.0.0.
On the Specify Home Details page, select the Oracle home in which you installed Oracle Database 10g Release 2 in the previous procedure. Do not rely on the default setting to be correct.
On the Product-Specific Prerequisite Checks page, verify that all checks succeeded. If any checks failed, then you must correct the problem before proceeding.
On the Summary page, review your previous choices, then click Install.
On the End of Installation page, confirm that the installation was successful.
The step-by-step instructions in this guide are for installations on a Windows platform. The following are some tips to help you with the differences between the Linux and Windows platforms.
Follow the instructions in the installation guide for your platform. Be sure to set system variables and perform any other pre-installation tasks.
During the installation, you must run some SQL scripts as root, so make sure that you have root access.
To run Oracle Universal Installer, type runInstaller from the installation disk or directory.
Create a script for setting the appropriate environment variables, or include the settings in the initialization script for your operating system login (such as .profile or .cshrc). Perform any other post-installation tasks.
The following is a sample script for setting environment variables:
setenv ORACLE_ROOT /dat1/10gR2
setenv ORACLE_BASE ${ORACLE_ROOT}
setenv ORACLE_HOME ${ORACLE_BASE}/oracle/product/10.2.0/db_1
setenv ORACLE_PORT 1521
setenv ORACLE_SID rel10g
setenv TNS_ADMIN ${ORACLE_HOME}/network/admin
setenv PATH ${ORACLE_HOME}/bin:${ORACLE_HOME}:$PATH
|
See Also:
|
The information in this section is for DBAs who plan to install Oracle Database on Real Application Clusters (RAC) or deploy Data Mining models in a different database than the one in which they were developed.
When Oracle Database is installed on RAC, the Data Mining tables should be stored in a tablespace with a raw device partition. You can define this tablespace during installation of Oracle Database by choosing Raw Devices on the Specify Database File Storage Option page. Pre-installation steps are required for this storage option. Refer to the Installation Guide for your platform for more information.
You only need to install the Data Mining Scoring Engine on computers where you will apply models that were built on another computer system. The Scoring Engine is an Enterprise Edition option that can be installed only during a custom installation. You can include the Data Mining Scoring Engine in a new installation, or you can add it to an existing installation at a later time.
|
Note: The Data Mining Scoring Engine and the Data Mining option cannot be installed on the same computer. Installation of one option will de-install the other option. No other database options are affected by installation of the Data Mining Scoring Engine. |
To add the Data Mining Scoring Engine to an existing installation of Oracle Database, take these steps:
Open Oracle Universal Installer as described in "Installation of Oracle Database 10g".
On the Select Installation Type page, select Custom.
On the Specify Home Details page, select the Oracle home in which you previously installed Oracle Database 10g Release 2. Do not rely on the default setting to be correct.
On the Available Product Components page, select Data Mining Scoring Engine. 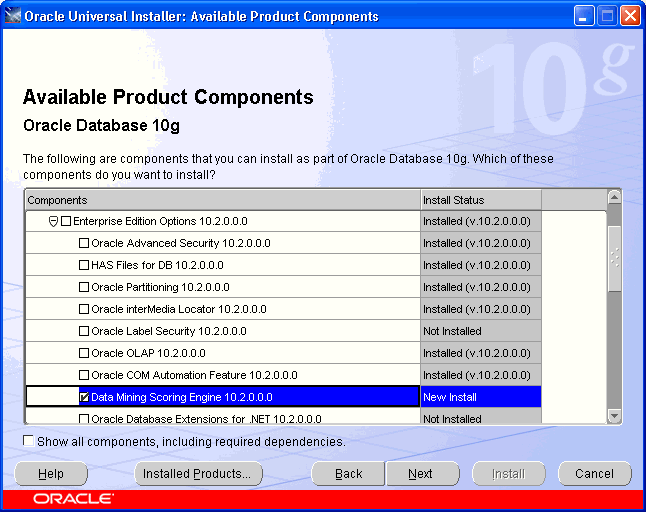
Description of the illustration db_cust2.gif
If Data Mining is installed, then the following SQL query returns TRUE:
SELECT VALUE FROM V$OPTION WHERE PARAMETER = 'Data Mining';
If the Data Mining Scoring Engine is installed, then the next SQL query returns TRUE:
SELECT VALUE FROM V$OPTION WHERE PARAMETER = 'Data Mining Scoring Engine';
For more detailed information, query DBA_REGISTRY with a command such as this one:
SQL> SELECT COMP_ID, VERSION, STATUS FROM DBA_REGISTRY WHERE COMP_ID = 'ODM';

COMP_ID                        VERSION                        STATUS
------------------------------ ------------------------------ -----------
ODM                            10.2.0.0.0                     VALID
If Oracle Database 10g Release 1 is installed on your computer, then install Oracle Database 10g Release 2 into a separate Oracle home. A new version of the Data Mining option is installed along with the other components of Oracle Database.
During installation of release 10.2, Oracle Universal Installer will detect 10.1 databases and will prompt you to upgrade them. For upgrading, the Installer will open the Database Upgrade Assistant (DBUA). It automatically upgrades these Data Mining components:
Databases
DMSYS repository schema
PL/SQL data models in user schemas
|
See Also: Oracle Database Upgrade Guide for complete upgrade instructions |
The data mining objects in these schemas require additional upgrade steps after upgrading the database:
DMSYS Repository Schema. The odmu101s.sql script removes redundant release 10.1 objects.
User Schemas. The odmu101a.sql script re-creates the views of the Sales History sample schema for users who wish to run the sample Data Mining programs described in Chapter 4.
To upgrade the DMSYS repository, follow these steps:
Open SQL*Plus and connect to the database as the SYS user or another privileged account.
Verify that the compatibility mode is set to 10.2.x.x (such as 10.2.0.0).
SELECT name, value, description FROM v$parameter
         WHERE name='compatible';
If the compatibility model is incorrect, then edit the init.ora file for the database.
Run the odmu101s.sql script.
Issue this command on Windows platforms:
%ORACLE_HOME%\rdbms\admin\odmu101s.sql
Or this command on Linux platforms:
$ORACLE_HOME/rdbms/admin/odmu101s.sql
To upgrade the sample Sales History views in the schemas of Data Mining users, take these steps for each schema:
Backup the schema using the expdp command in Oracle Data Pump.
Open SQL*Plus and connect to the database as the SYS user or another privileged account.
Run the odmu101a.sql script, passing it two parameters: user_name and password.
Issue this command on Windows platforms:
%ORACLE_HOME%\rdbms\admin\odmu101a.sql user_name password
Or this command on Linux platforms:
$ORACLE_HOME/rdbms/admin/odmu101a.sql user_name password
All data mining PL/SQL models residing in user schemas in a release 10.1 database can be upgraded as part of the database upgrade. The upgrade of models is seamlessly integrated into the database upgrade process.
You can also export models from a release 10.1 database and import them into a release 10.2 database. The import process upgrades the models to release 10.2. Use the expdp and impdp command utilities in Oracle Data Pump. The Data Mining option or the Data Mining Scoring Engine option must be installed in the target database.
|
Note: Java models cannot be upgraded. They must be re-created in Oracle Database 10.2. |
The Database Upgrade Assistant invokes procedures in the Data Mining DMP_SYS public package for upgrading and downgrading PL/SQL models between release 10.1 and 10.2.
The UPGRADE_MODELS procedure upgrades the Data Mining models from release 10.1 to 10.2, and has this syntax:
UPGRADE_MODELS (
     to_version     IN     VARCHAR2);
The DOWNGRADE_MODELS procedure downgrades models from release 10.2 to 10.1, and has this syntax:
DOWNGRADE_MODELS (
     from_version   IN     VARCHAR2);
These procedures are integrated with the Data Mining upgrade and downgrade processes and run as SYS. You do not need to run them manually.
You can downgrade a database from release 10.2 to release 10.1 if the compatibility setting is set to 10.1.x.x. Otherwise, the database will include incompatibilities that will prevent it from being downgraded. The Data Mining option and user-owned PL/SQL models will be downgraded as part of database downgrade.
|
See Also: Oracle Database Upgrade Guide for complete downgrade instructions |