Release 2 (9.2)
Part Number A96596-01
Home |
Book List |
Contents |
Index |
 Master Index |
 Feedback |
| Oracle9i Real Application Clusters Administration Release 2 (9.2) Part Number A96596-01 |
|
This chapter provides detailed procedures on how to add nodes and instances and how to delete instances in Real Application Clusters database environments. The topics in this chapter are:
| See Also:
Oracle9i Real Application Clusters Setup and Configuration for procedures on using the Database Configuration Assistant (DBCA) to create and delete databases |
This section explains how to dynamically add nodes to Real Application Clusters environments. The topics in this section are:
| See Also:
"Deleting Instances" for procedures on deleting an instance |
The procedure for adding nodes to Real Application Clusters comprises two main steps:
The method for adding nodes at the clusterware layer is operating-system dependent as described in this chapter. For the second step, adding a node at the Oracle layer, the procedures in this chapter require using the Oracle Universal Installer (OUI) and the Database Configuration Assistant (DBCA). The procedures for the second step are generic and therefore apply to all platforms.
On UNIX, unless you preconfigure your clusterware to accommodate additional nodes, you cannot dynamically add nodes. Therefore, you must stop the clusterware and reconfigure your clusterware to accommodate additional nodes. Then follow the procedures under the heading "Adding a Node at the Clusterware Layer on UNIX".
On Windows NT and Windows 2000, Oracle supplies the cluster software or operating system-dependent (OSD) clusterware. This enables you to dynamically add nodes as described under the heading "Adding a Node at the Clusterware Layer on Windows NT and Windows 2000".
The topics in this section are:
You can take advantage of the scalability and high availability features of Real Application Clusters by adding new nodes to existing UNIX clusters that uses a Real Application Clusters database. As mentioned, you can add nodes without stopping your database if you have preconfigured your UNIX cluster to accommodate additional nodes.
Oracle Corporation recommends using the following procedures to add new nodes to existing Real Application Clusters in UNIX environments. These procedures assume that there is already a UNIX cluster running your Real Application Clusters database.
To prepare the new node, ensure that it is an exact clone of the existing nodes in terms of vendor operating system, clusterware software, and so on. Then perform the following tasks in the order shown to add a node at the clusterware layer on UNIX:
Connect the new node's hardware to the existing cluster. This includes electrical connections, network interconnects, shared disk subsystem connections, and so on. Refer to your hardware vendor documentation for details on this step.
Install the cluster software by referring to your vendor's installation procedures. Also use your vendor documentation for procedures to make the new node an active member of your cluster.
If your platform supports a cluster file system and you not are using raw devices for your cluster database, then you do not need to create raw devices as described in this section. Proceed to "Adding a Node at the Oracle Layer".
As part of the preinstallation steps before installing the Real Application Clusters software on the new node, create at least two new disk volumes to accommodate the redo logs for the new instance. Refer to Oracle9i Real Application Clusters Setup and Configuration for the requirements for these redo logs and the preinstallation steps.
Make the disk volumes for the redo logs the same size as the redo log volumes that you configured for your existing nodes' instances. Refer to your vendor documentation for procedures on creating disk volumes and raw devices.
If the cluster database to which you want to add a new node and instance uses automatic undo management, then create an additional raw volume for the new undo tablespace for the new instance. After completing this step, proceed to "Adding a Node at the Oracle Layer" to add the node at the Oracle layer.
| See Also:
Oracle9i Real Application Clusters Setup and Configuration for more information about creating raw devices |
You can take advantage of the scalability and high availability features of Real Application Clusters by dynamically adding new nodes to an existing Windows cluster that uses a Real Application Clusters database.
Oracle Corporation recommends using the following procedures to add a node in Windows environments. These procedures assume that there is already a Windows cluster running your Real Application Clusters database and that the new node uses the same operating system that is running on the existing nodes of your cluster. For example, you should have installed Microsoft Windows NT 4.0 or Windows 2000 on all the nodes in your cluster.
Perform the following tasks in the order shown to add a new node at the clusterware layer on Windows NT and Windows 2000:
Connect the new node's hardware to the existing cluster. This includes electrical connections, network interconnects, shared disk subsystem connections, and so on. Refer to your hardware vendor documentation for details on this step.
If you are using your operating system vendor supplied clusterware on the existing nodes, also install this vendor software on the new node using your vendor's installation procedures.
However, if you are using Oracle Corporation's reference clusterware/operating system-dependent software on the existing nodes of your cluster, you must also install these Oracle OSD clusterware on the new node using the Cluster Setup Wizard. To do this, perform the following steps from one of the existing nodes before running the wizard:
NET USE \\host_name\C$
Where the host_name is the public network name of the new node. You have administrative privileges on each node if the operating system responds with:
Command completed successfully.
PREINSTALL\CLUSTERSETUP directory, for example:
cd \PREINSTALL\CLUSTERSETUP
clustersetup
See Also:
|
As part of the preinstall requirements before installing the Oracle database software on a node for Oracle Real Application Clusters, create raw disk partitions. Create at least two new disk partitions to accommodate the redo logs for the new instance. Make these disk partitions the same size as the redo log partitions that you configured for the existing nodes' instances. If the database to which you want to add a node uses automatic undo management, then create an additional logical partition for the undo tablespace.
| See Also:
Oracle9i Real Application Clusters Setup and Configuration for more information on configuring raw partitions on Windows NT and Windows 2000 platforms |
From one of the existing nodes of the cluster:
On Windows 2000, start Disk Management using the path: Start > Programs > Oracle - [HOME_NAME] > Administrative Tools > Computer Management. Then expand the Storage folder to Disk Management. For Windows 2000 only, use a basic disk as an extended partition for creating raw partitions.
You do not need to perform these procedures if you have a cluster file system.
Create the links to the partitions that you created in the "Create Disk Partitions" section so the existing nodes recognize these links. In addition, the new node should also recognize the pre-existing symbolic links to logical drives as well as the new links. To create these links, perform the following steps from one of the existing nodes:
%ORACLE_HOME%\bin directory:
GUIOracleOBJManager
The Object Link Manager automatically detects the symbolic links to the logical drives and displays them in OLM's graphical user interface (GUI).
For example, if your Real Application Clusters database name is db and it consists of two instances running on two nodes and you are adding a third instance on the third node, your link names for your redo logs are db_redo3_1, db_redo3_2, and so on.
_undotbs3.At this point, you have added the new node to the cluster at the clusterware layer. To add a node to an existing cluster at the Oracle layer, on all platforms perform the following steps:
The following procedures explain these steps in detail.
Follow these steps to install the Oracle software on the new node:
ORACLE_HOME into which you are going to install the Oracle Enterprise Edition and Real Application Clusters software. The ORACLE_HOME you enter should be the same as the ORACLE_HOME that the existing nodes use.root.sh. Then exit the Oracle Universal Installer and proceed to the next section, "Post-Installation Steps".From the new node, perform the following post-installation steps:
bin directory in ORACLE_HOME to configure a new listener for the node.To add an instance on the new node, make sure that the Global Services Daemon (GSD) is running on all the existing nodes as well as on the new node. If the GSD is not running, then from any of the nodes execute the gsdctl start command from the following platform-specific locations:
Then go to one of the existing nodes and perform the following steps:
dbca in the bin directory in $ORACLE_HOME on UNIX, or on Windows NT and Windows 2000, choose Start > Programs > Oracle - HOME_NAME > Configuration and Migration Tools > Database Configuration AssistantThe DBCA wizard starts and displays the Welcome page for Real Application Clusters shown in Figure 8-1.

Text description of the illustration welcome.gif
|
Note: If the Welcome page for Real Application Clusters does not display, then the DBCA was unable to:
To resolve this, refer to your vendor's operating system-dependent documentation to correct the problem and restart the DBCA. |
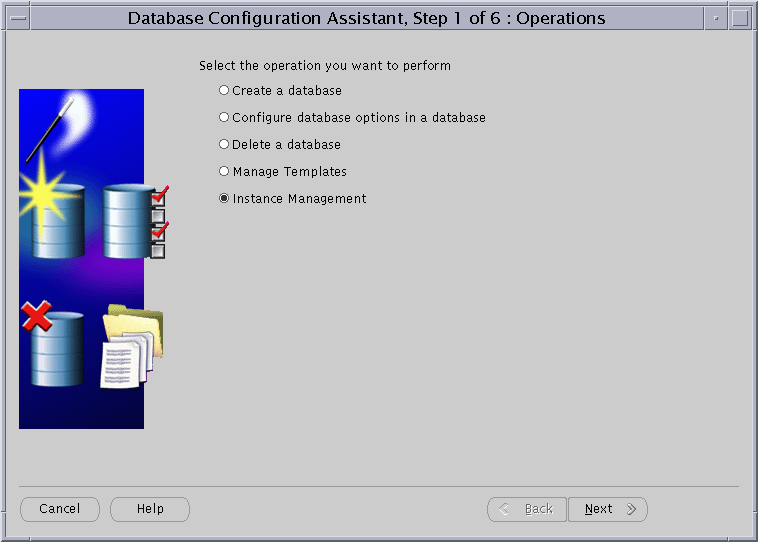
After you click Next, the DBCA displays the Instance Management page shown in Figure 8-3.
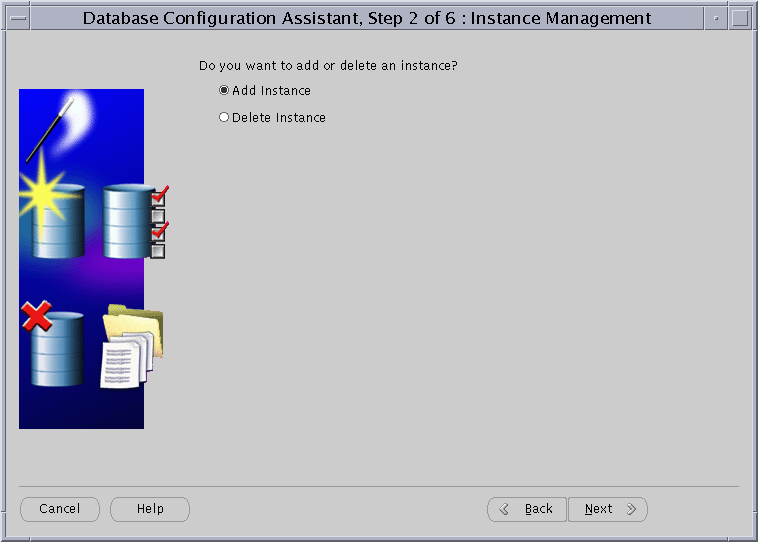
After you click Next, the DBCA displays the List of Cluster Databases page that shows the databases and their current statuses, such as ACTIVE, or INACTIVE, as shown in Figure 8-4.
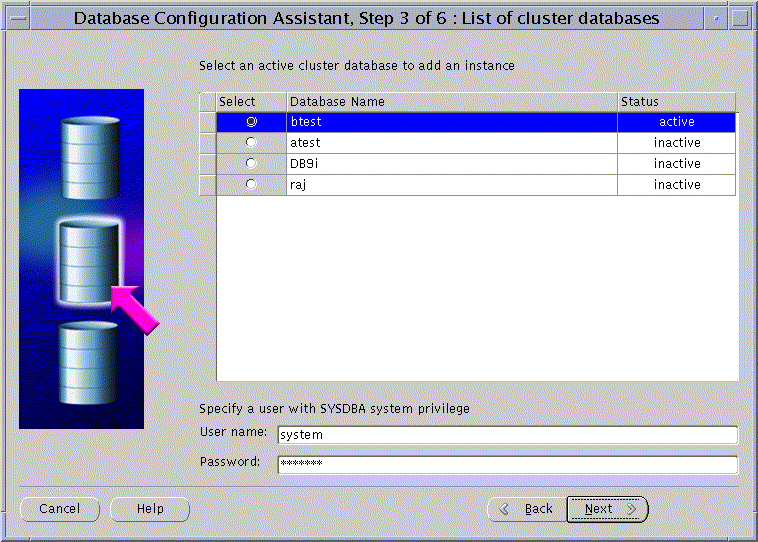
After you click Next, the DBCA displays the List of Cluster Database Instances page showing the names of the instances for the Real Application Clusters database that you selected as shown in Figure 8-5.
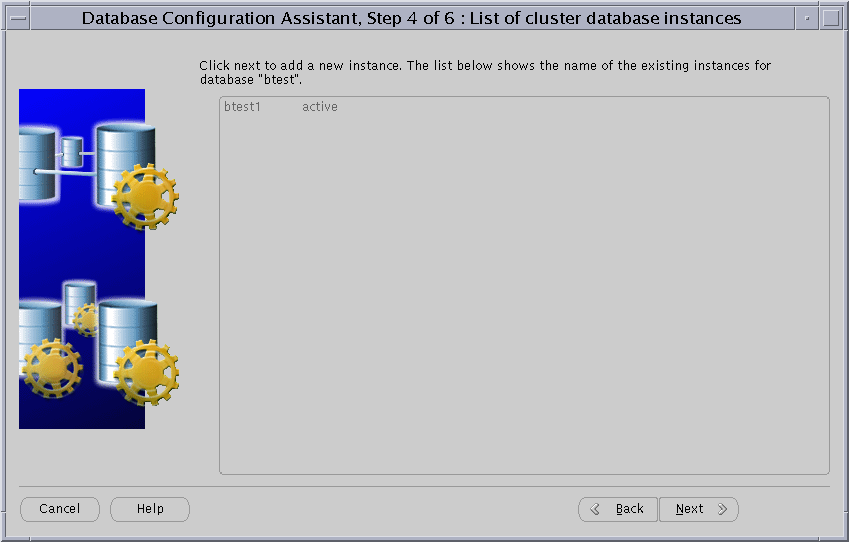
After you click Next, the DBCA displays the Adding an Instance page shown in Figure 8-6.
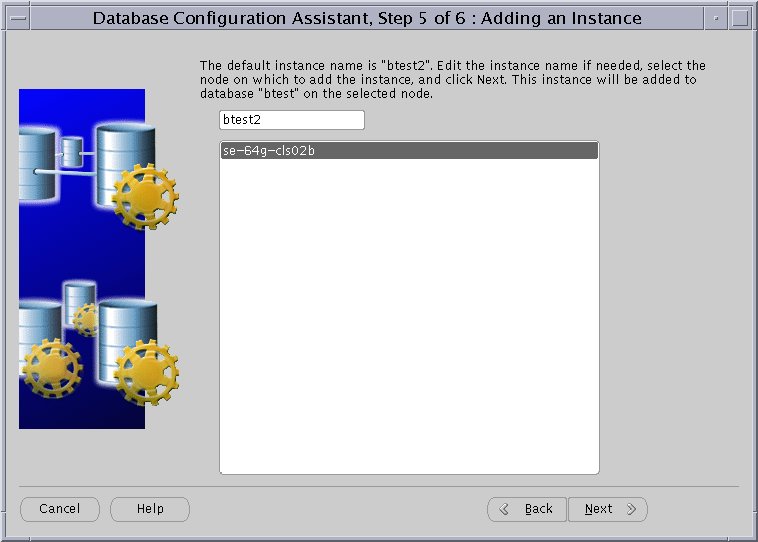
After you click Next, the DBCA displays the Database Storage page as shown in Figure 8-7.
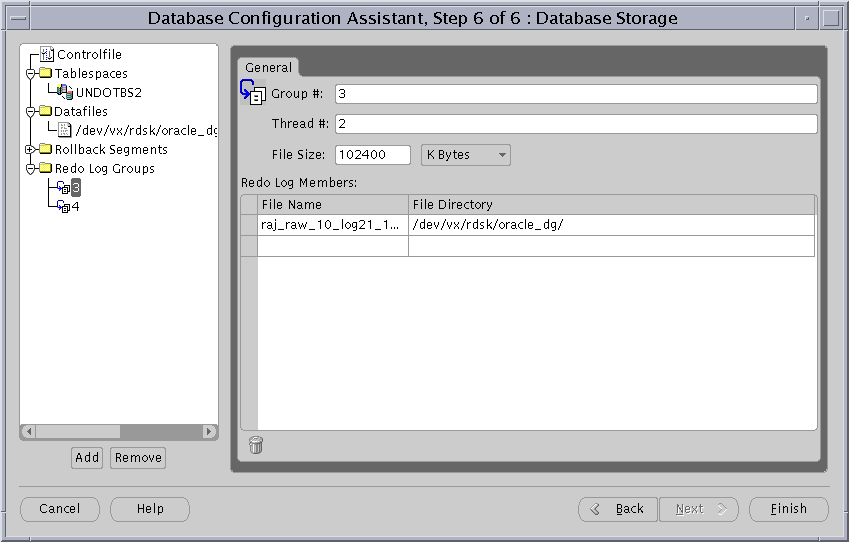
After you click Finish, the DBCA displays a Summary dialog similar to the dialog in Figure 8-8.
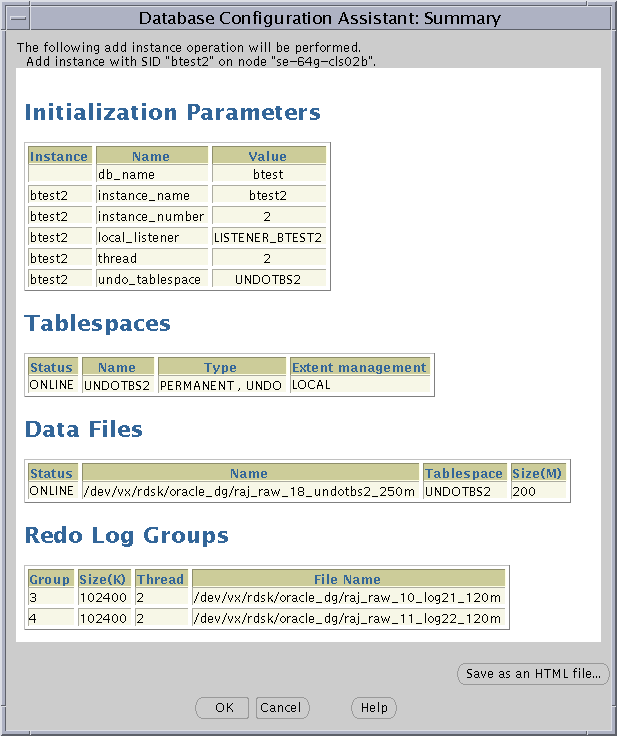
If you click OK, then the DBCA displays a progress dialog that shows the DBCA performing the instance addition operation. During this operation the DBCA adds the instance and creates the instance's Oracle Net configuration. When the DBCA completes the instance addition operation, the DBCA displays a dialog asking whether you want to perform another operation. Click No to exit the DBCA, or click Yes and the DBCA displays the Operations screen shown in Figure 8-3.
If you click No and continue the instance addition operation, then at this point you have accomplished the following:
The following procedures explain how to delete an instance with the Database Configuration Assistant. Where noted, refer to previous figures in this chapter. To delete an instance:
After you click Next, the DBCA displays the Instance Management page shown in Figure 8-9.
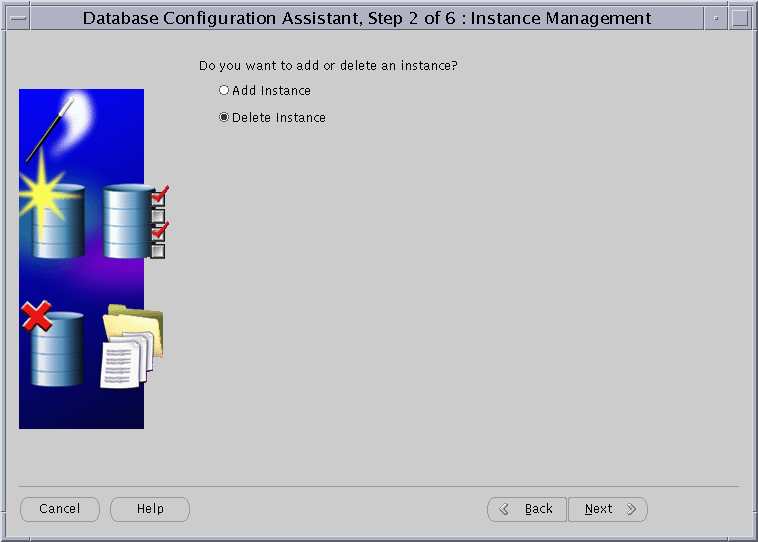
Text description of the illustration delinst.gif
After you click Next, the DBCA displays the List of Cluster Databases page shown in Figure 8-10.
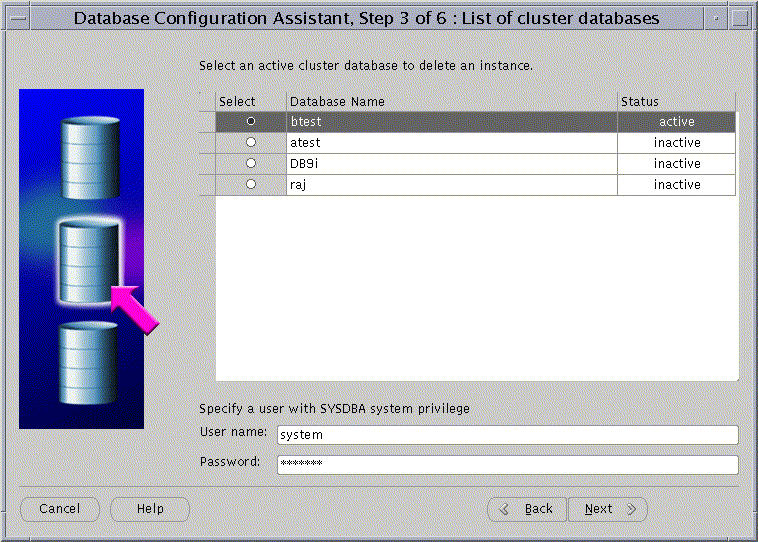
After you click Next, the DBCA displays the List of Cluster Database Instances page shown in Figure 8-11. The List of Cluster Database Instances page shows the instances associated with the Real Application Clusters database that you selected and the status of each instance.
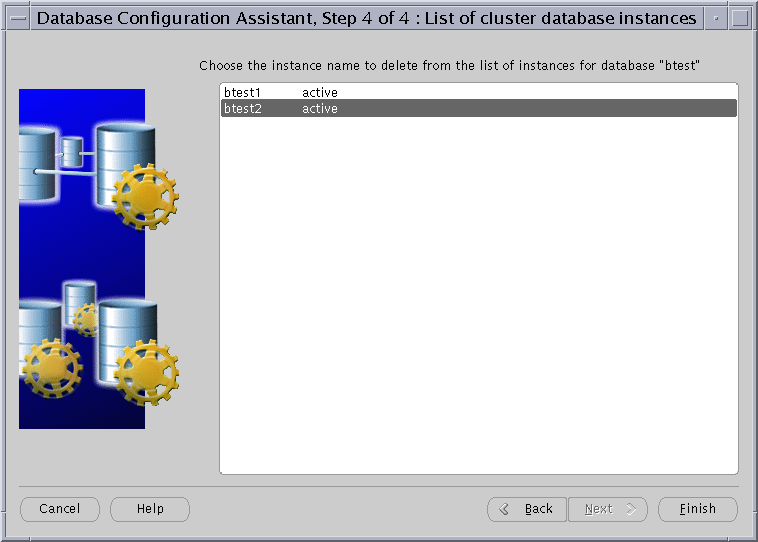
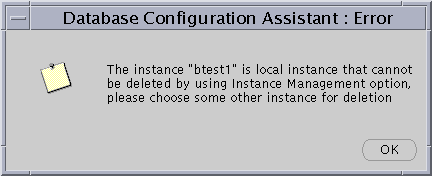
If you select the local instance, then the DBCA displays an Error dialog as shown in Figure 8-12.
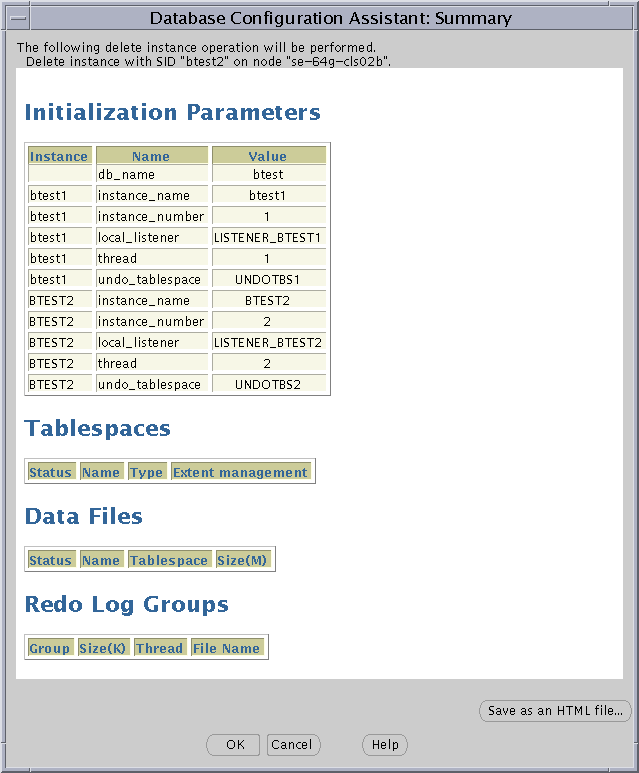
If you click OK, then the DBCA displays a Confirmation dialog similar to the dialog in Figure 8-14.
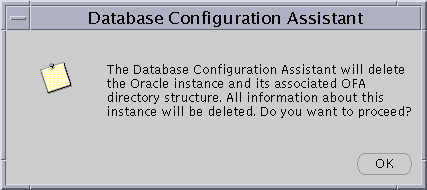
After you click OK, the DBCA displays a progress dialog showing that the DBCA is performing the instance deletion operation. During this operation the DBCA removes the instance and the instance's Oracle Net configuration. When the DBCA completes this operation, the DBCA displays a dialog asking whether you want to perform another operation. Click No and exit the DBCA or click Yes to perform another operation. If you click Yes, then the DBCA displays the Operations page shown in Figure 8-3.
At this point, you have accomplished the following:
|
 Copyright © 1998, 2002 Oracle Corporation. All Rights Reserved. |
|